
Run several course groups without rebuilding your lessons
Reuse your course outline while giving each group its own lessons, dates, seat limit and enrolment options in Taskpipe.
You can teach the same course again without rebuilding every lesson. In Taskpipe, each group has its own copy of the course, its own places and its own public details.
Here we use a sample photography group, “Autumn studio”, to show how to limit places and control how people find it.
Start each group from your course template
Open your course from Courses, then select Create cohort. It receives a copy of the template’s slides. You can then change that copy to suit the people joining.
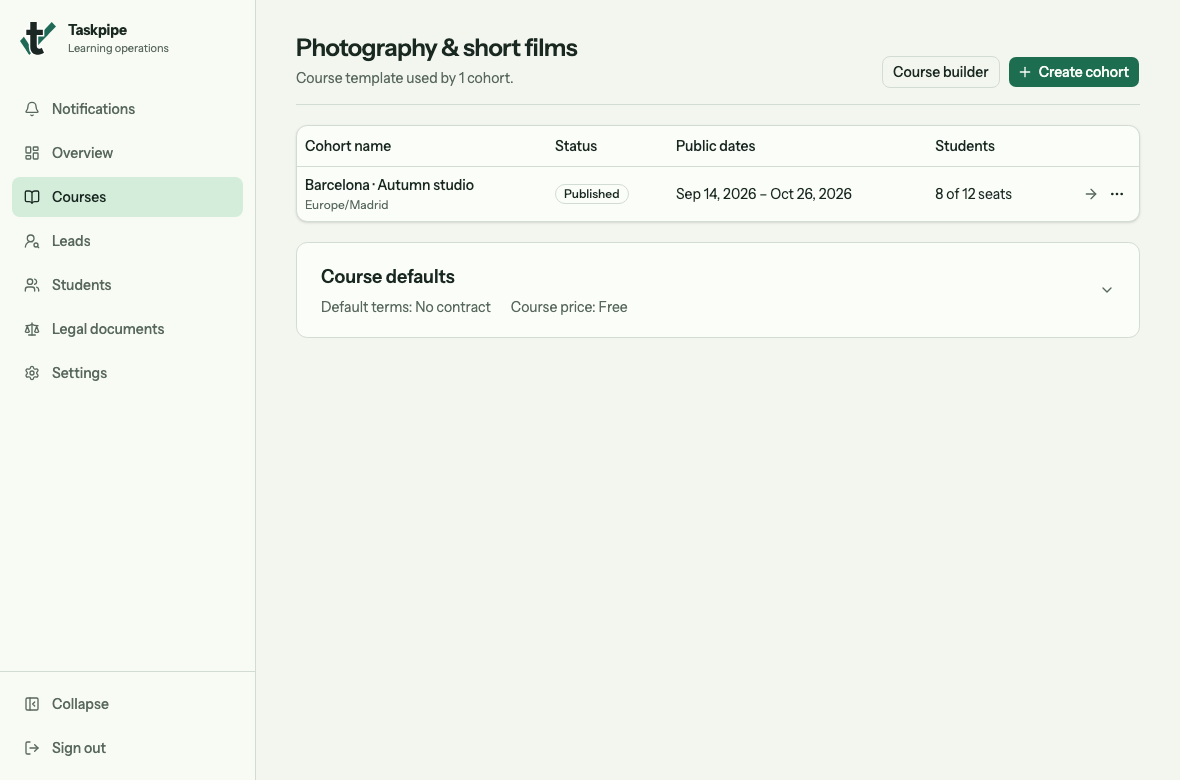
Create cohort starts another run. Open an existing group to work on its own copy.
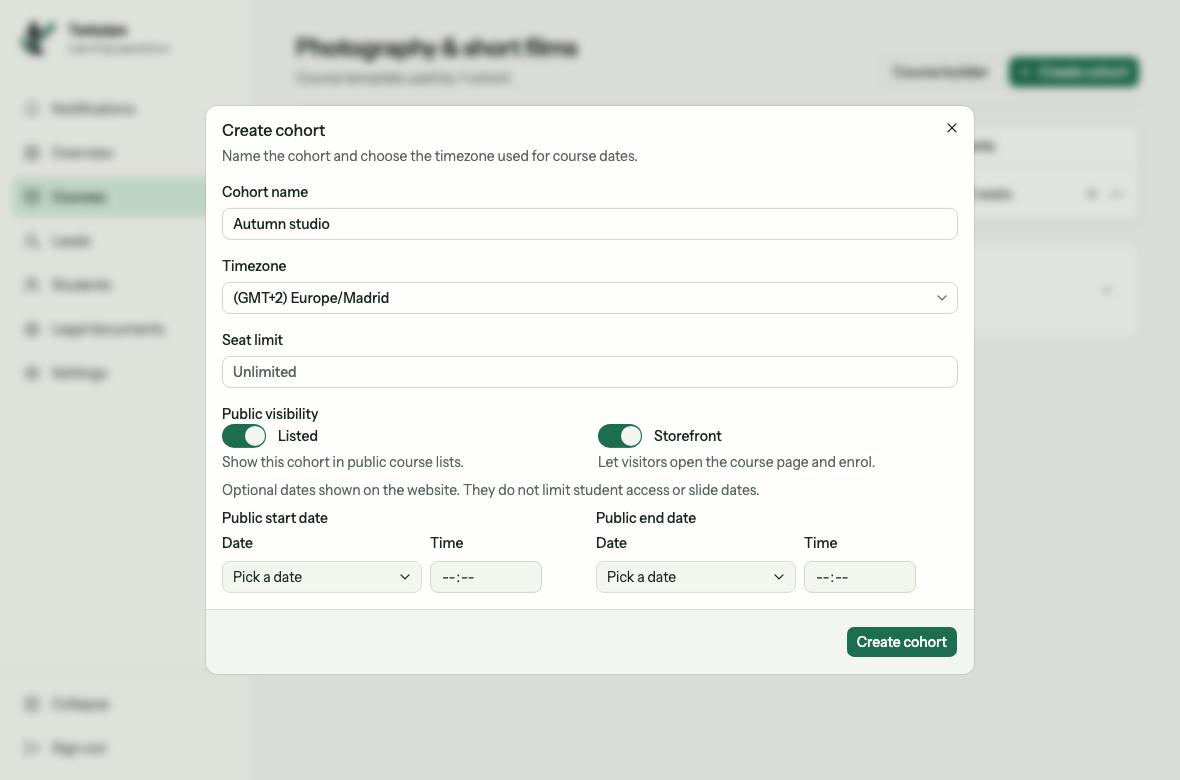
Name the group and check its time zone before selecting Create cohort.
For example, keep your main photography course as the template, then add a local photo walk to the Barcelona group. The next group can still start from the original lessons.
Changes to the template affect future groups. To change a group you have already created, edit that group’s own course copy.
Set a limit you can teach well
Suppose you have time to review work for twelve students. Open the group, then:
- Select Settings.
- Expand Seat capacity.
- Enter 12 in Seat limit.
- Select Save after changing the value.
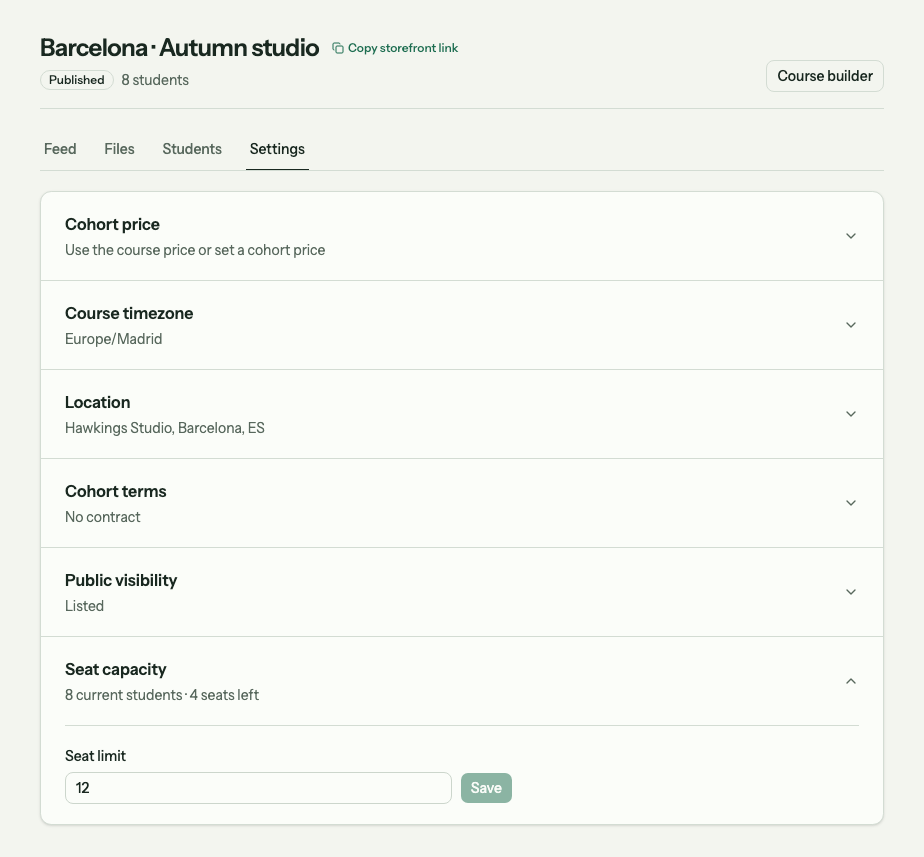
Seat limit is the total group size. With eight students already enrolled, this group has four places left.
Leave the limit empty if you do not need a fixed number of places. Every active student uses a seat, including students who join for free. Removing a student frees their seat.
A lead does not reserve a place, and neither does starting checkout. Keep that in mind when promoting the last few seats.
Set the public dates and enrolment page
In the same Settings tab, expand Public visibility:
- Enable Listed if connected websites should be able to show this published group in their course lists.
- Enable Storefront if visitors should be able to open its Taskpipe course page and enrol there.
- Set the public start and end dates buyers should see.
- Select Save after making changes.
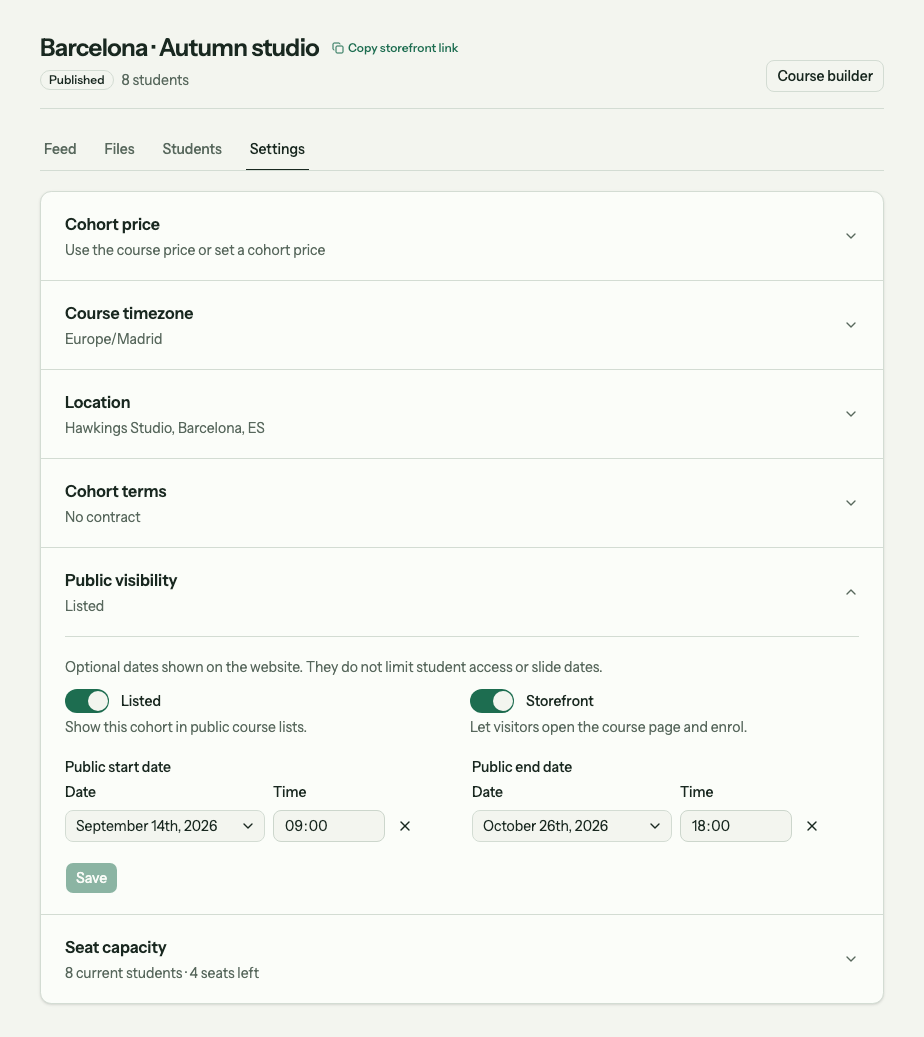
Listed controls whether the group appears in public course lists. Storefront controls its enrolment page. The dates here tell buyers when the group runs.
For an open group, you may want both switches on. To share a course page with a particular audience, turn Listed off and leave Storefront on. Anyone with the link can still open it; this does not make the page private.
If your team handles enrolment elsewhere, you can turn Storefront off. Existing students keep their course access. Draft and closed groups do not appear in public lists.
Set teaching dates separately
Public dates help buyers choose a group. They do not open lessons or set assignment deadlines.
Open the group’s course builder to set those dates. Copied slides start without opening times or deadlines, so check every task that needs a date before publishing. Check Course timezone in the group’s settings too.
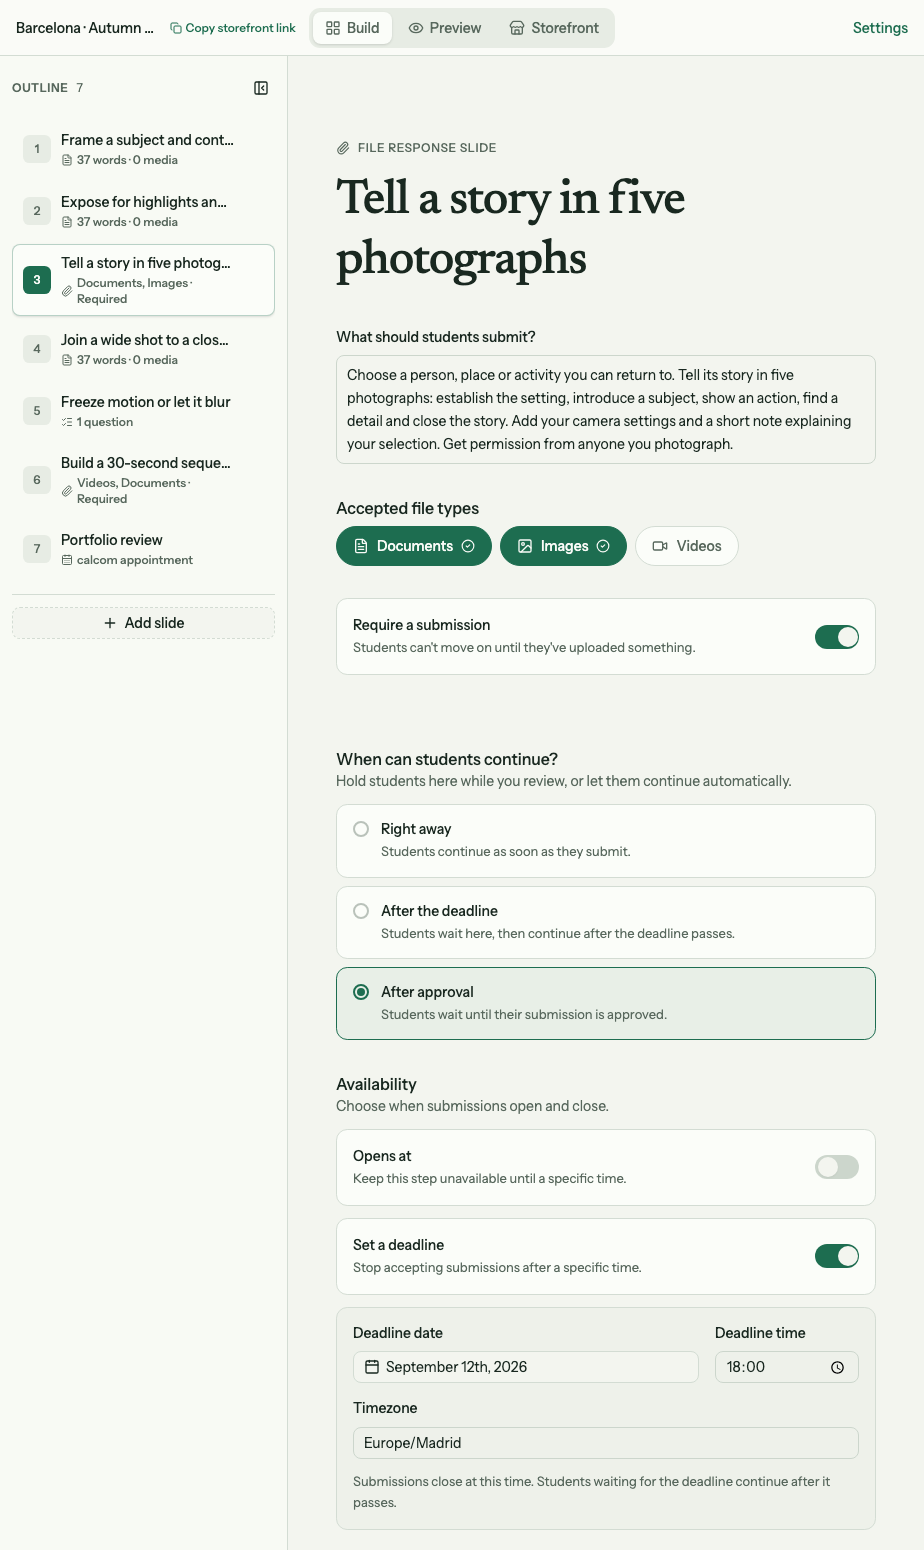
Set each task’s deadline in this group’s copy of the course.
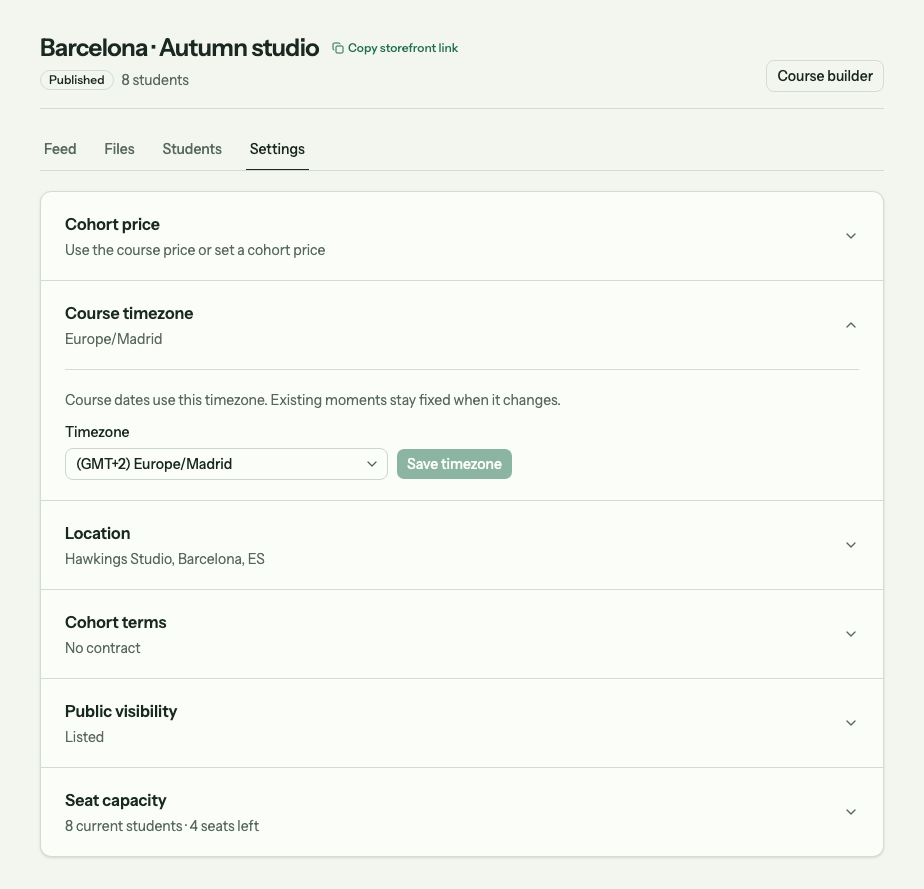
Course timezone controls how the group’s dates are shown and entered.
For a course taught partly in person, use Location to add the country, city and venue. A connected website can use these details to help visitors find the right group.
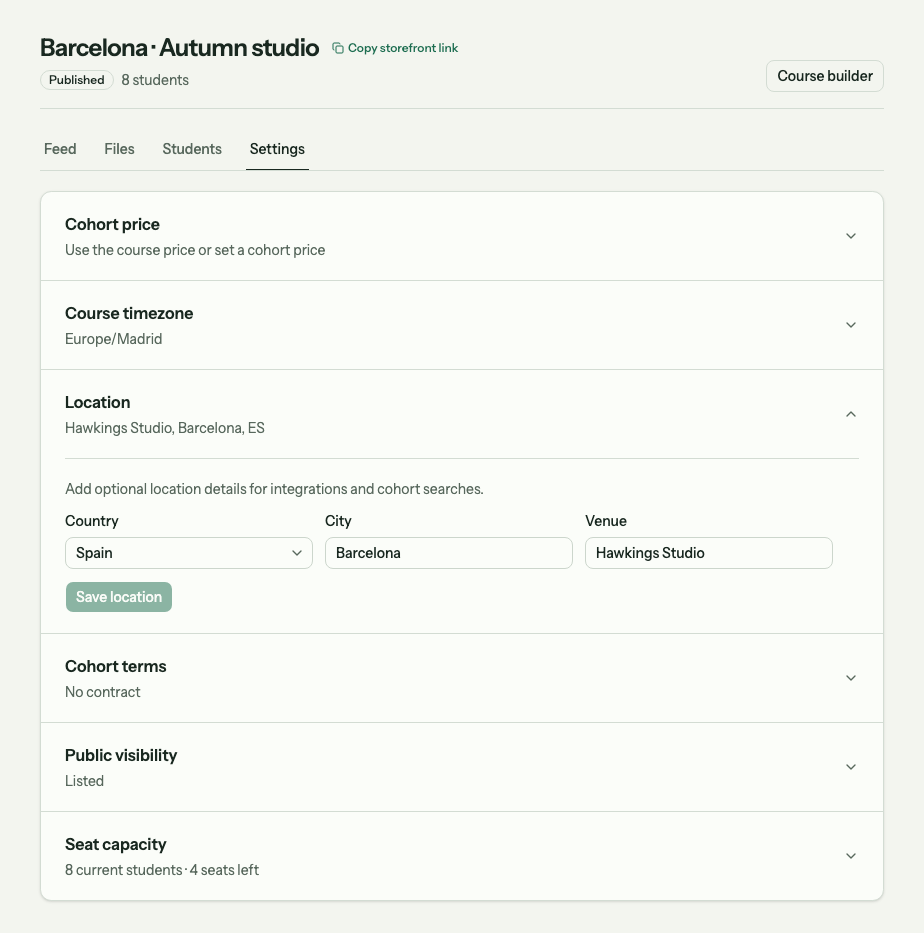
Enter the country, city and venue, then select Save location.
Improve the next run
Use questions and submissions from the current group to improve your template. A clearer brief can be ready for the next group without changing the task current students were asked to do.
If they need that change too, edit their group’s copy. For help choosing review points and deadlines, see the practice and feedback guide.