
Build a course around practice, feedback and progress
Use assignments, quizzes, approval steps and appointments to give students a clear path from watching a lesson to putting it into practice.
Watching a lesson is only the start of learning a practical skill. An assignment gives students a reason to try it and gives you work you can help them improve.
Here we use the sample photography course to set up a photo assignment, choose when students can continue and review their work.
Create an assignment with a clear brief
In the course’s Build tab, use Add slide and choose File response. If you already have an assignment, select it in the outline.
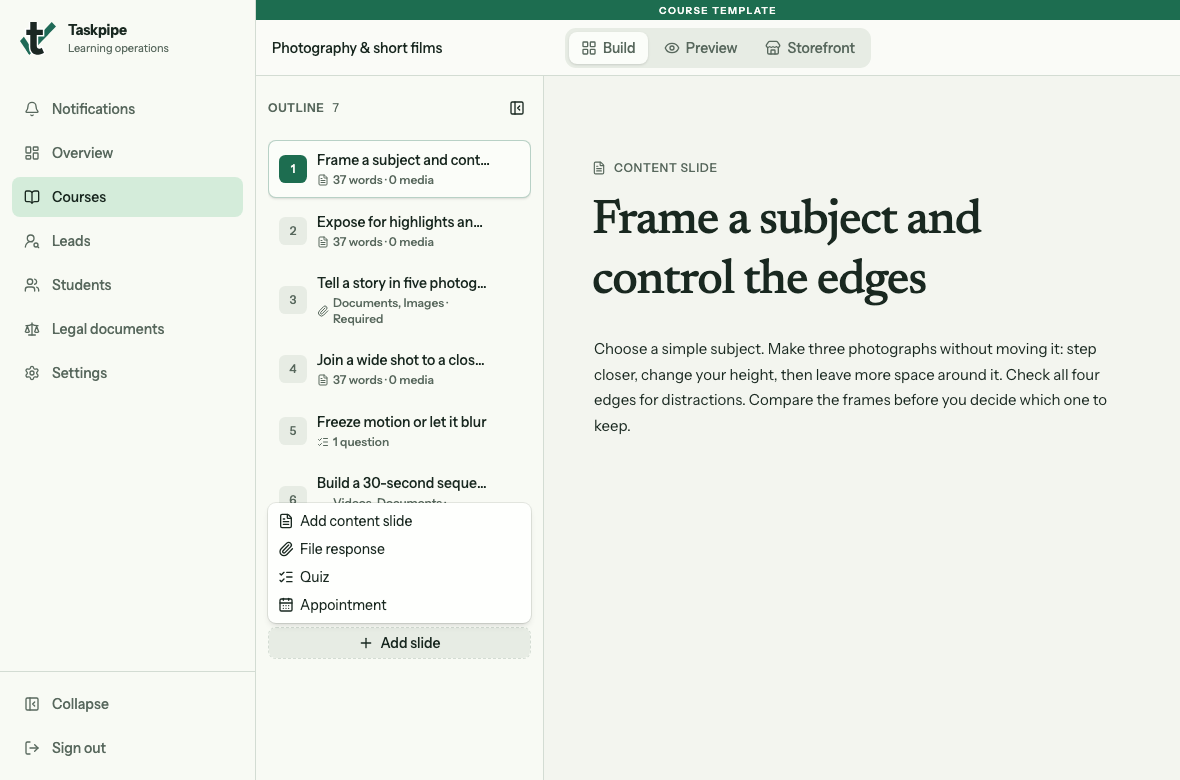
This menu adds the assignment, quiz and appointment steps used in this guide.
- Give it a title that says what to make. Our example is “Tell a story in five photographs”.
- Write the brief: ask for five photographs with a clear beginning, middle and end, plus notes explaining the choices. Tell students what you will look for when reviewing their work.
- Under Accepted file types, select Images for the photos and Documents for the notes. Leave Videos off because this task does not ask for a film.
- Enable Require a submission so students need to hand in work to complete this step.
- Under When can students continue?, choose After approval if you want to review the story before they move on.
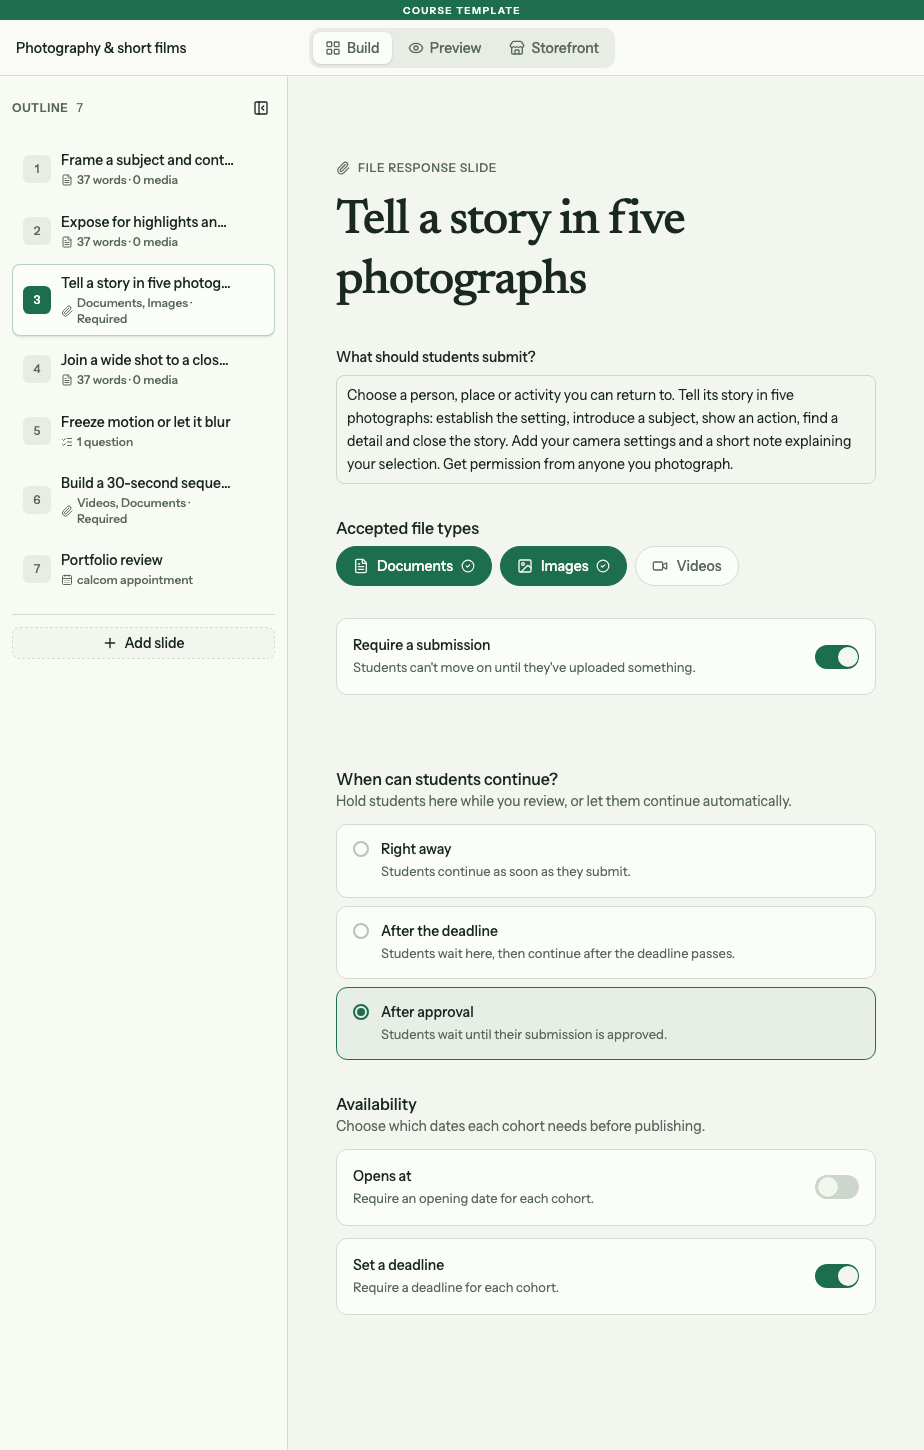
The file choices match the brief. After approval holds the next step until you have reviewed the submission. Availability, below it, controls whether the task needs opening and deadline dates.
Choose a pace you can support
After approval is useful when the next task depends on getting this one right. It also means a student may be waiting for you. Tell the group when you expect to review work.
For practice that does not need your approval, choose Right away: students can continue after handing in the required work. Choose After the deadline when you want them to wait for a shared deadline before continuing.
In the course template, Availability lets you mark a task as needing an opening time or deadline. Set the actual dates in each group’s builder, and check the group’s time zone. The sample assignment has Set a deadline enabled; each new group still needs its own date.
If you choose After the deadline, set that deadline before publishing. A public course start date does not set lesson opening times.
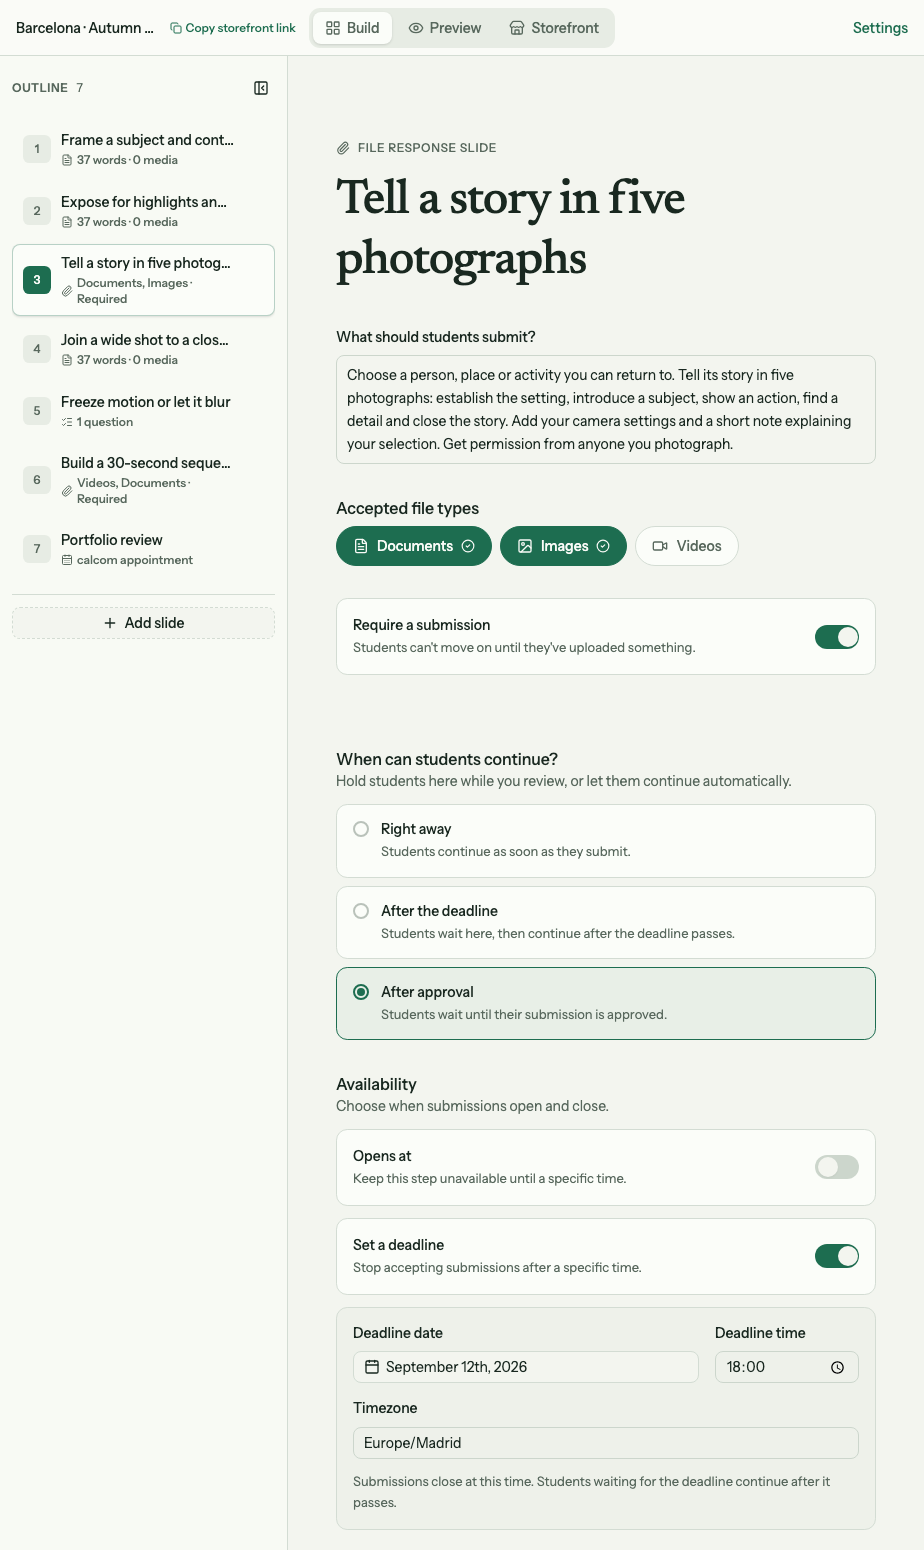
In a group’s builder, Set a deadline reveals the date and time fields. Check the time zone shown beneath them.
Review a student’s submission
Open the group’s Students area, choose a student and open their Course record. Expand the assignment to read its brief and inspect the submitted files.
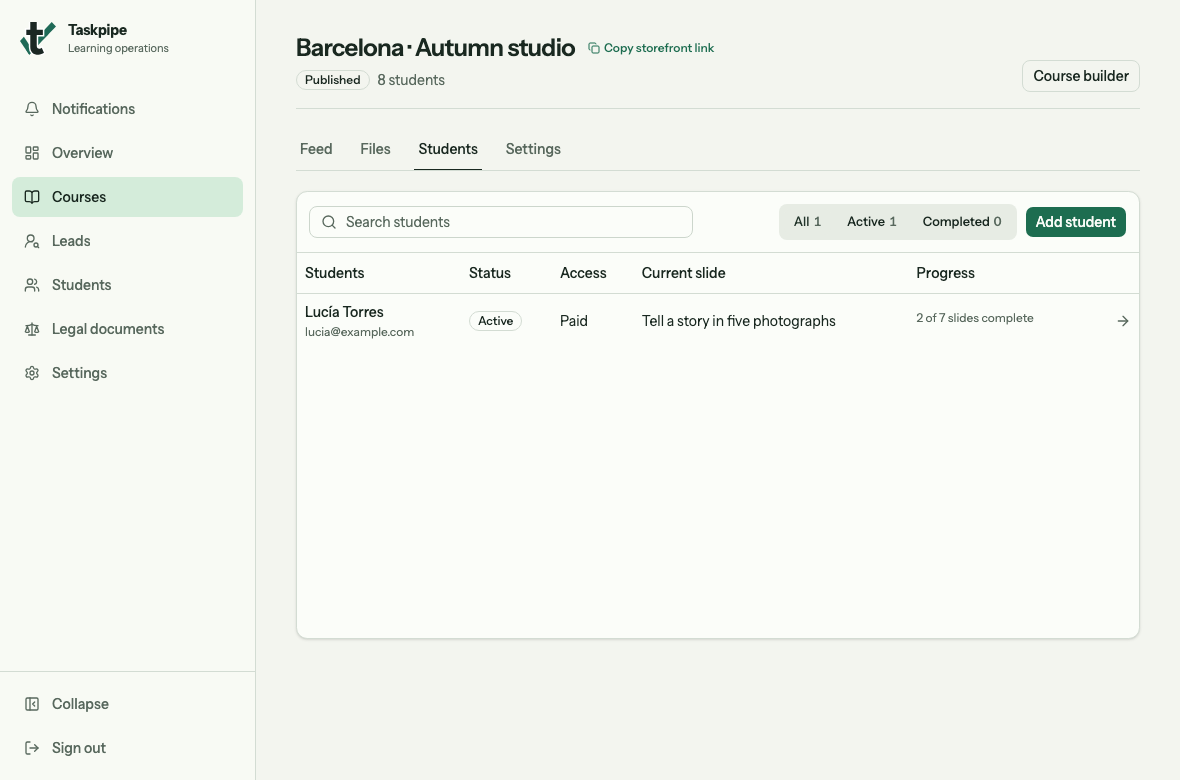
Open the student’s row to reach their course record.
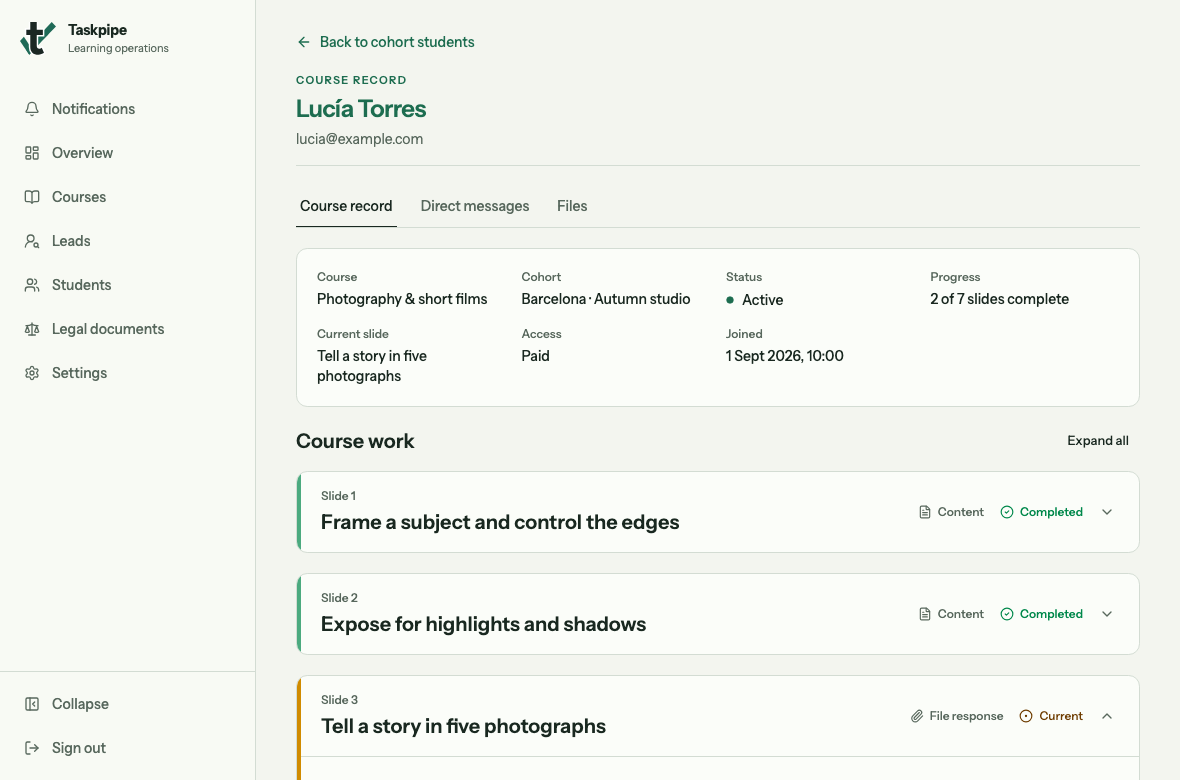
Course record contains the work; Direct messages is where you can discuss it privately.
For the photo story, check whether the images work as a sequence and whether the notes explain the student’s choices. Use private messages to discuss changes. When the work is ready, select Approve response so the student can continue past an approval step.
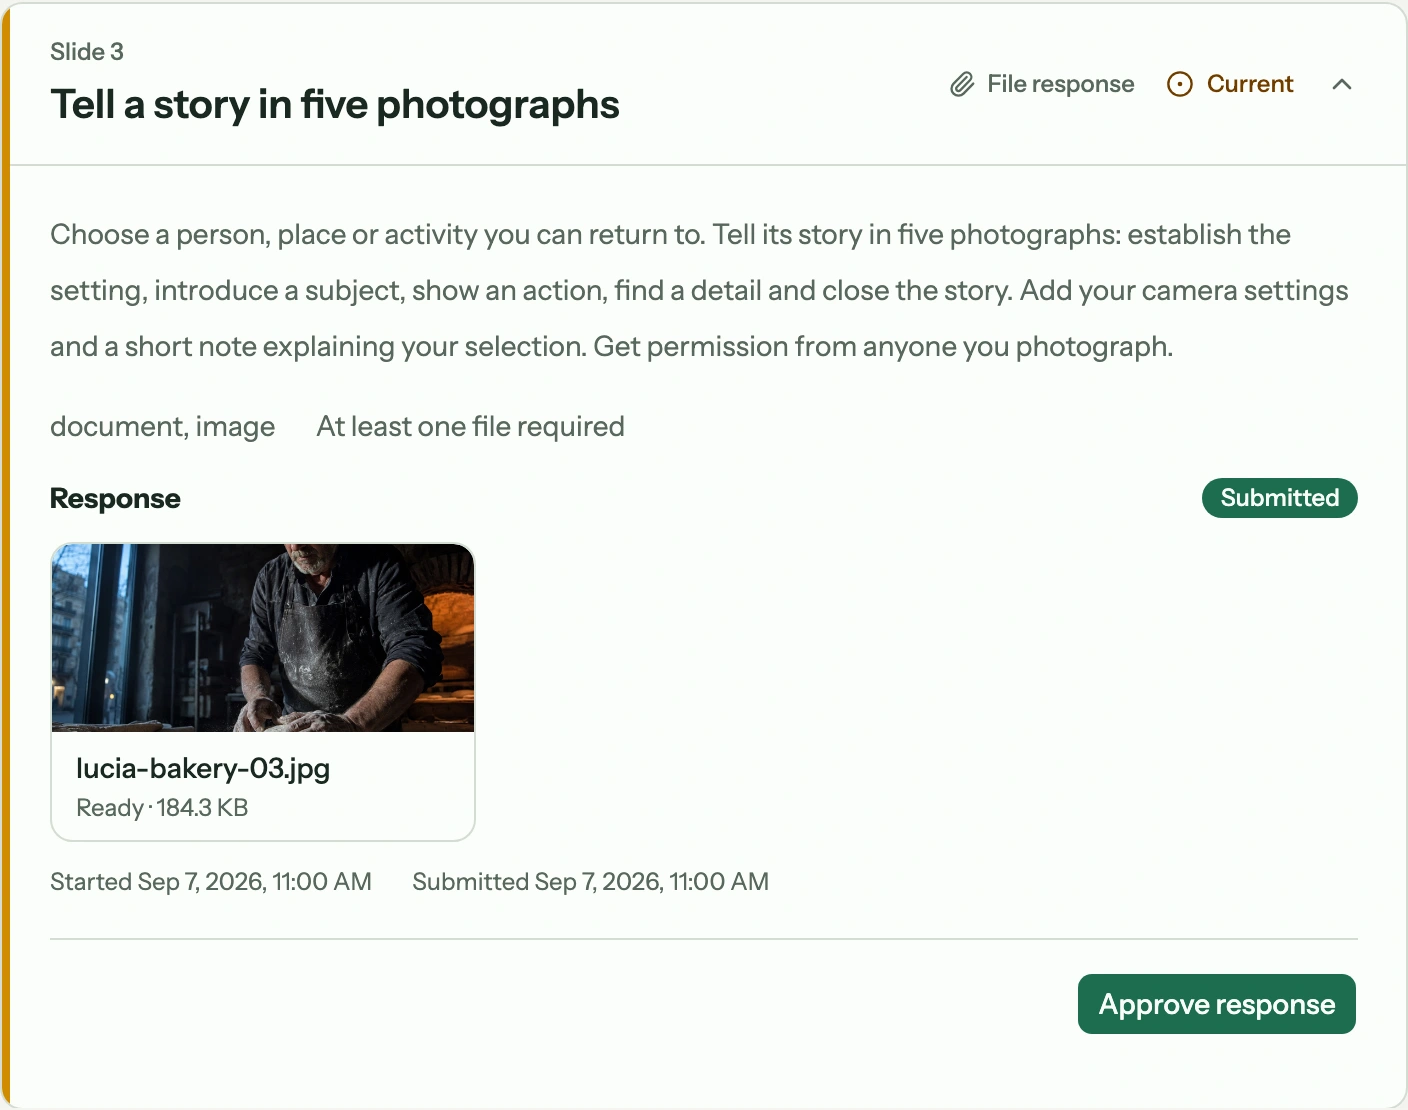
Check the submission against the brief above it. Approve response is the action that clears this review step for the student.
Add a quiz where a choice needs explaining
Use Add slide → Quiz to check understanding between practical tasks. You can mix multiple-choice questions with written answers.
After a lesson on photographing movement, ask students which shutter speed would freeze a moving subject, then ask them to explain when they would choose blur instead. The first answer checks recall; the second gives you something to discuss.
You can show all questions or draw a random selection from a larger pool. Keep the questions focused on what students will need for the next task.
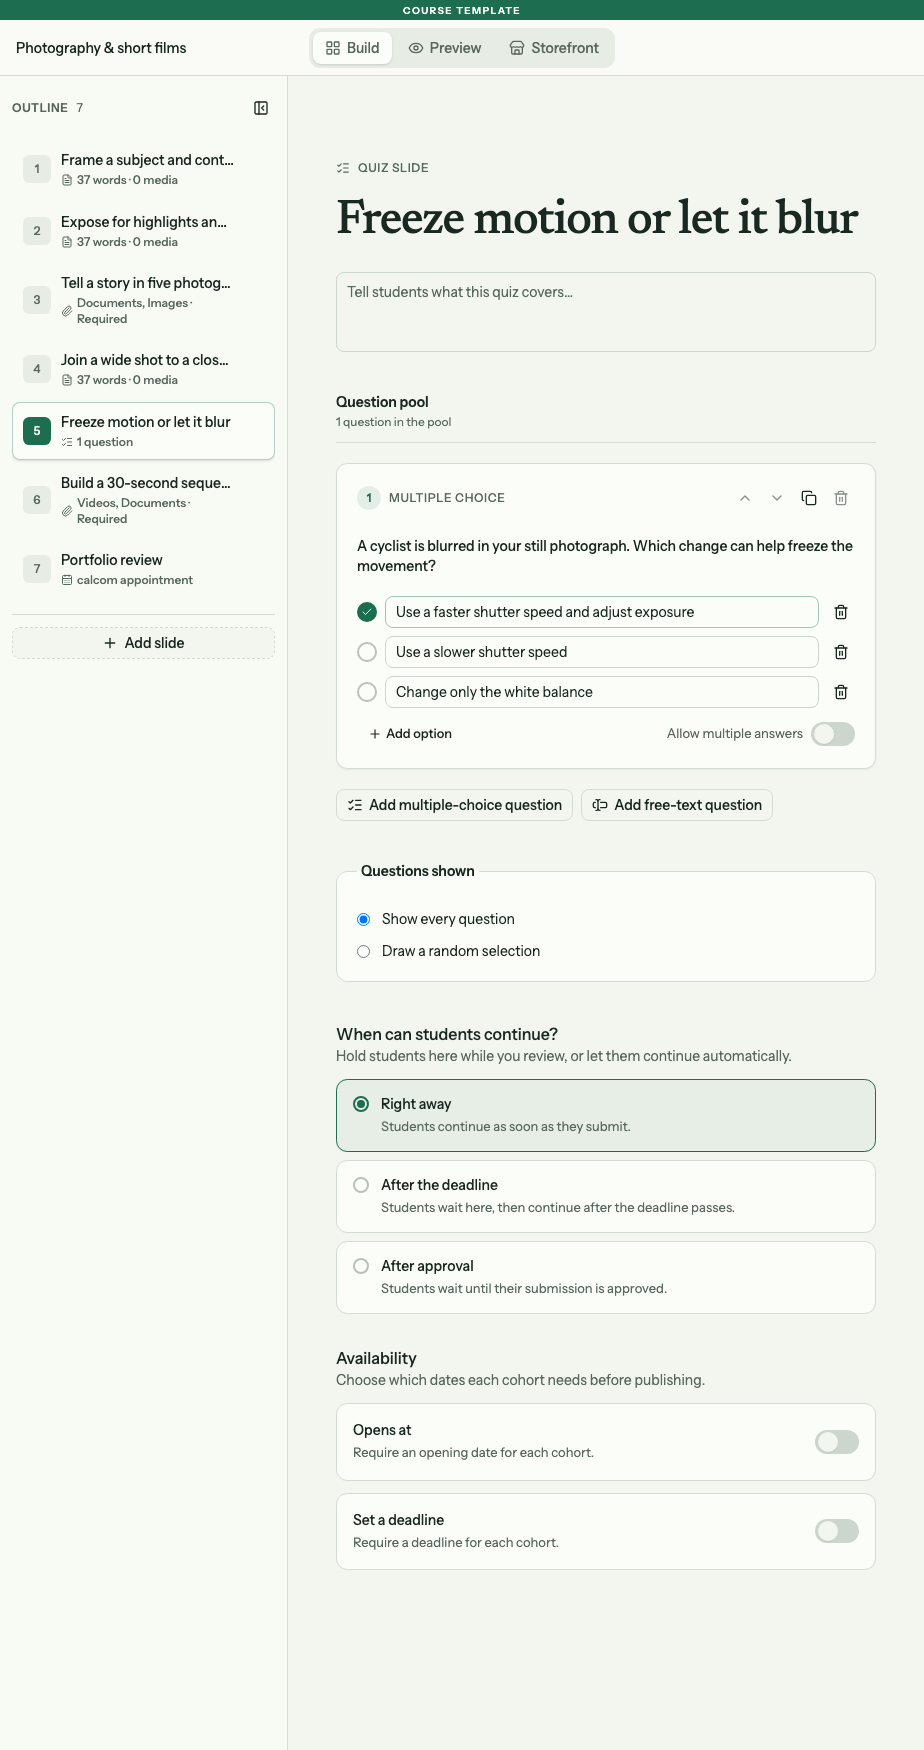
Mark the correct choice in the question. Use Add free-text question for an explanation, and Questions shown to choose all questions or a random selection.
Make room for personal feedback
If your course includes a review call, open Settings → Scheduling to connect Cal.com or Calendly.
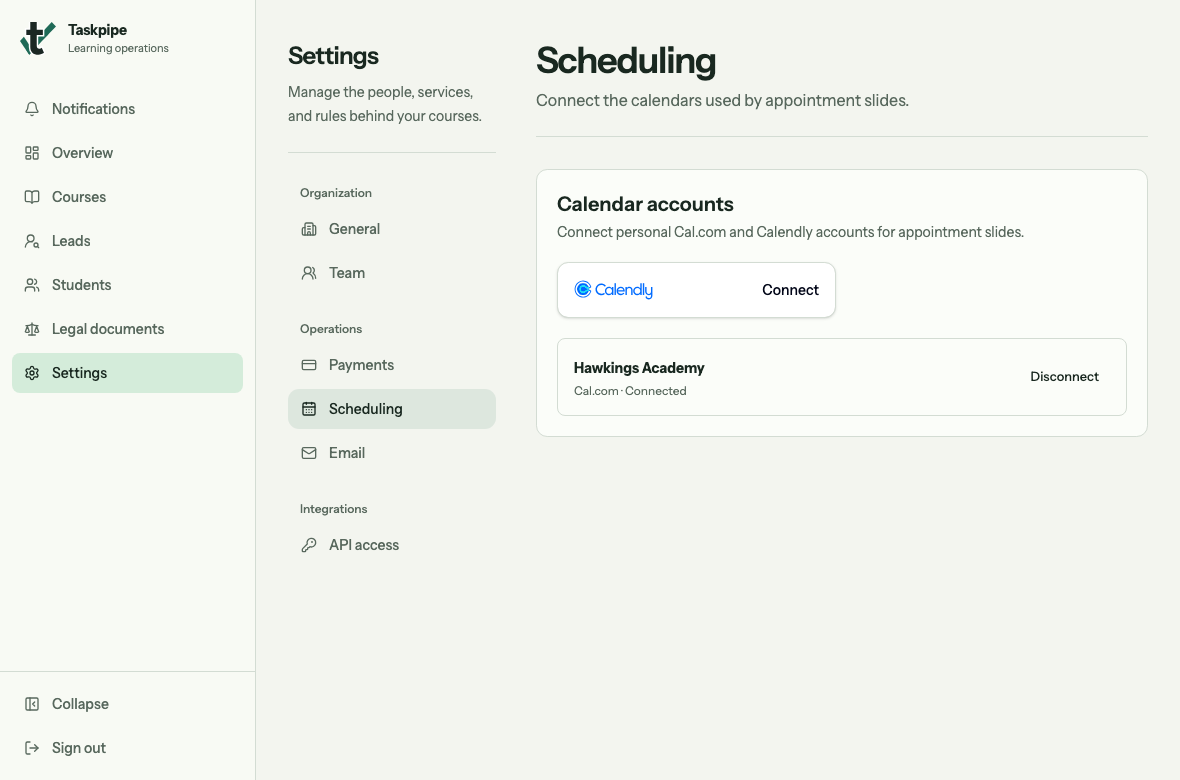
This example already has Cal.com connected. The connection is then available in the appointment editor.
Add an Appointment step from the menu shown earlier. Choose your Calendar account and the Event type students should book.
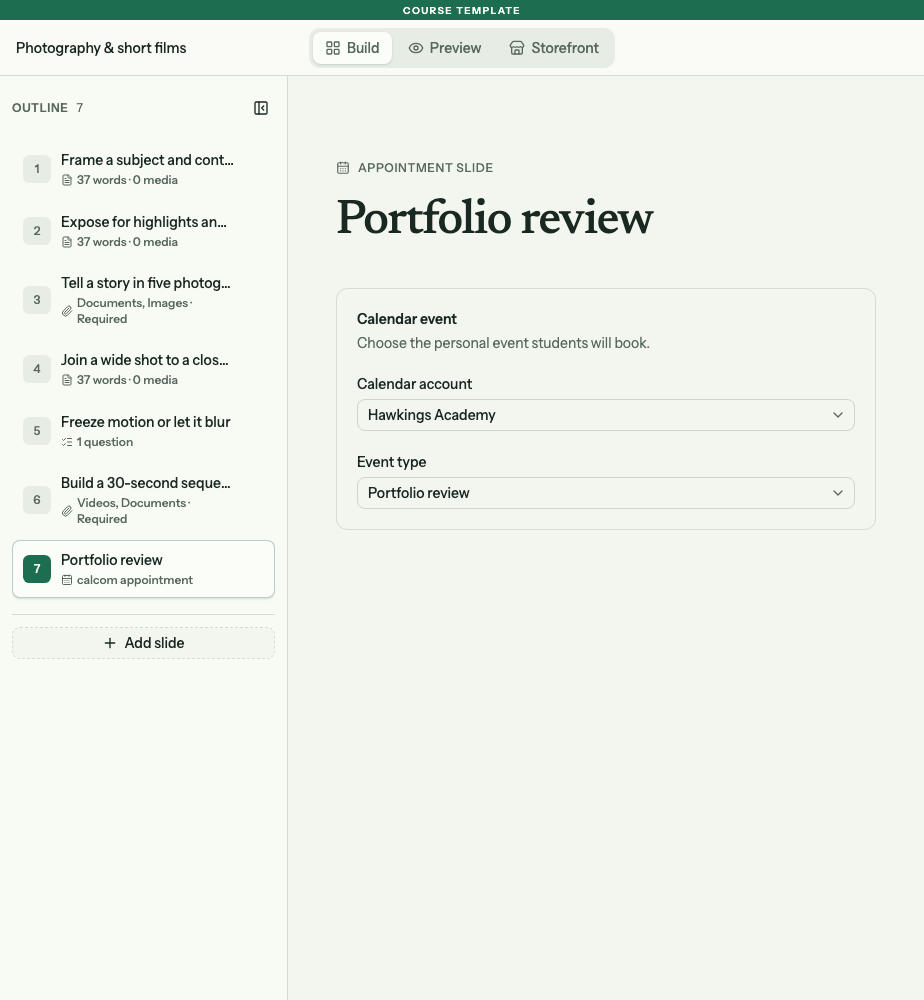
Select the review event that belongs to this course. The example uses a portfolio review.
Place a portfolio review after the photo assignment so you have work to discuss. Use the group feed for advice that helps everyone and private messages for feedback on one student’s work.
Start with one approval point and enough time to support it. If you need to limit the number of students you review, set a seat limit for the group.