
Launch your first online course with Taskpipe
Turn your teaching into an online course. Build your lessons, open a group, set up enrolment and welcome your first students with Taskpipe.
You have something to teach. Start with one course and one group of students, then add more as your business grows.
This guide uses a photography course to show the steps. The screenshots use a sample school, Hawkings Academy. Follow the same steps with your own lessons, whether you teach photography, coach clients or train a team.
Write your first lesson
Choose one result students should reach by the end of the course. For our example, it is a short photo story and a finished film. Each lesson should help them towards that result.
Open Courses → Create course, enter the course name and select Save course.
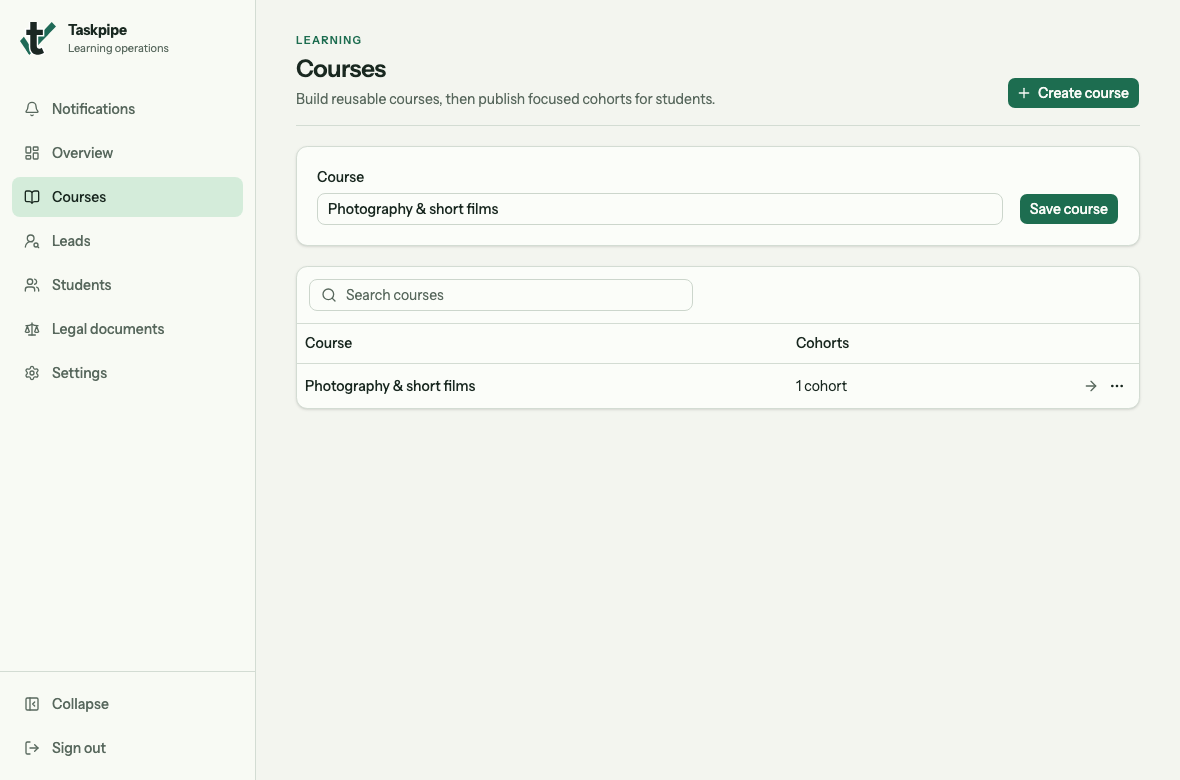
Enter your course name in the form above the course list.
Open the course and choose Course builder, then Build. Taskpipe calls each step a slide. Start with a content slide for your first lesson:
- Select the lesson in the outline on the left.
- Enter a clear Slide title. Our first lesson is “Frame a subject and control the edges”.
- Write the lesson below the title. Give students a small task they can try straight away. Here, they take three photos of the same subject, changing their distance, height and the space around it.
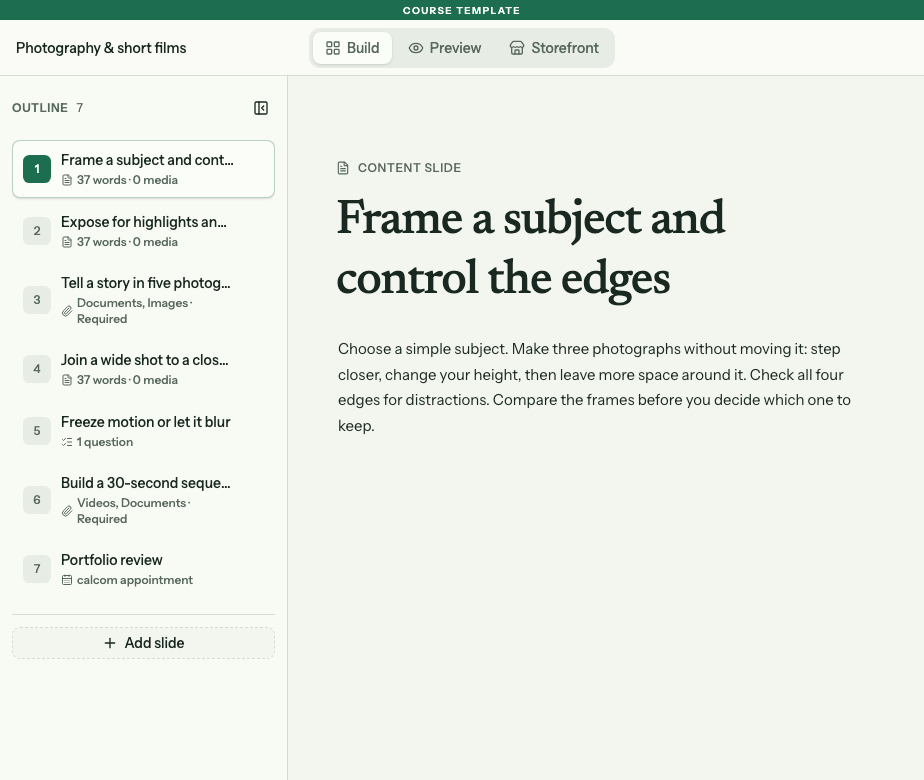
The selected step on the left is the lesson being edited on the right. Use the title field to name it and the area below to write the teaching material.
Use Add slide to build the rest of the course. Begin with a few lessons and one task where students show what they have learned. Our sample outline also includes a quiz and a portfolio review; you can add these when you need them.
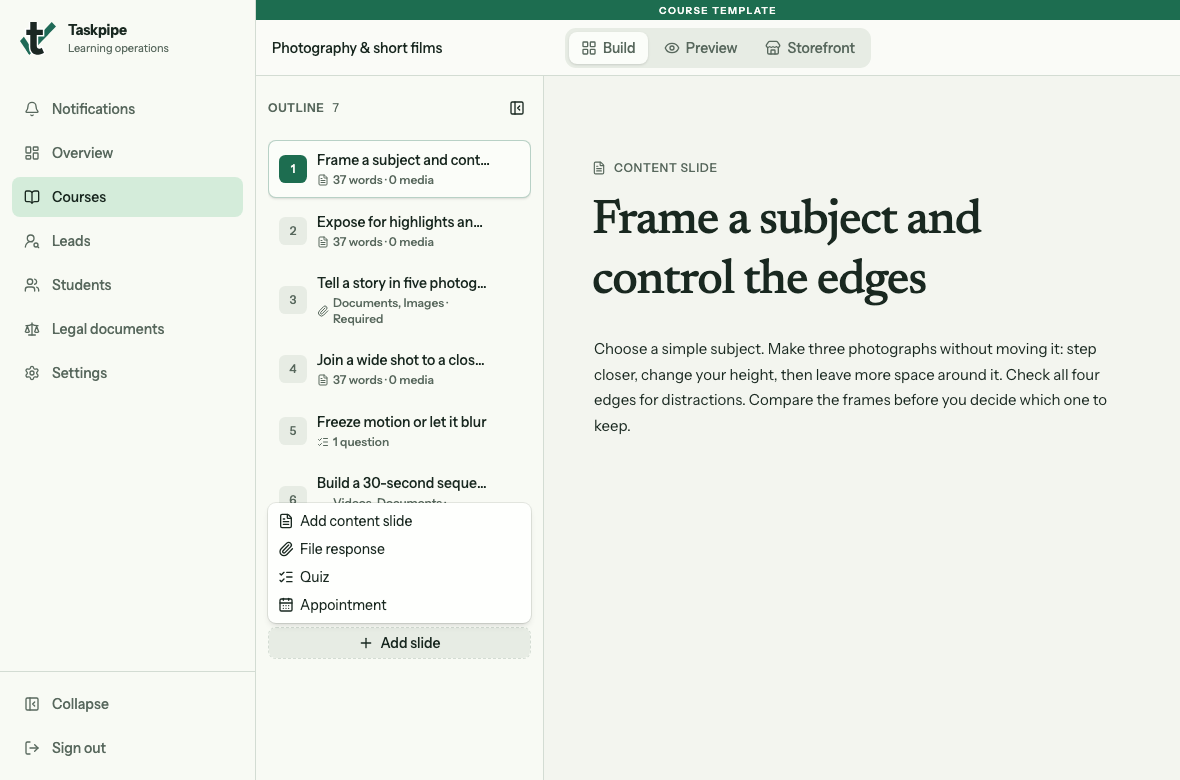
Choose Add content slide for a lesson. File response asks students to hand in work.
Create your first group
A cohort is a group taking one run of your course. Open the course from Courses and select Create cohort. Give it a name that helps you tell it apart from future groups, such as “Autumn studio”.
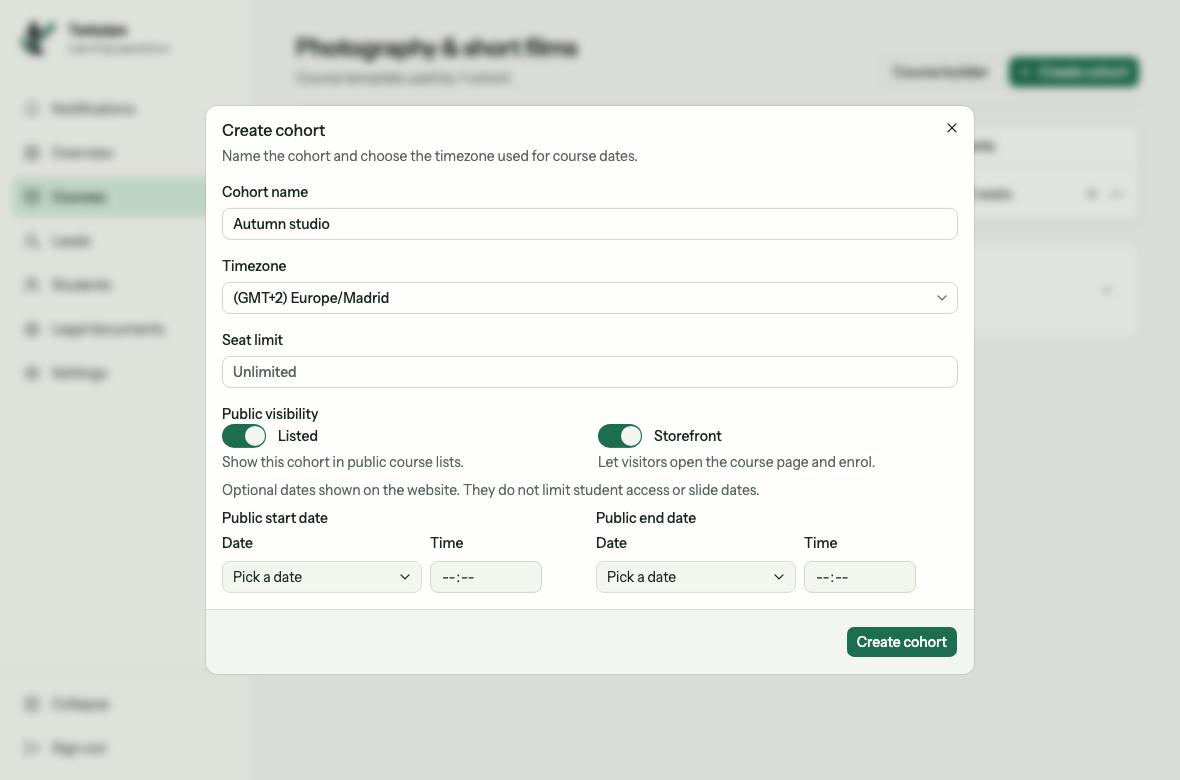
The group name and time zone belong to this run of the course.
The group gets its own copy of the lessons. Changes to the original course will apply to future groups, without changing the work your current students are following.
In this form, set a Seat limit if you have limited time for feedback. Under Public visibility, add the dates you want buyers to see and enable Listed and Storefront if you want the group listed and open for enrolment on its public page. Select Create cohort when the details are ready.
The course groups guide shows these settings. Public dates do not schedule lessons: set lesson opening times and assignment deadlines separately in the group’s builder if you need them.
Prepare the page where people join
In the course’s Storefront area, explain who the course is for, what students will make and what help they will receive. Add a cover image that fits the course.
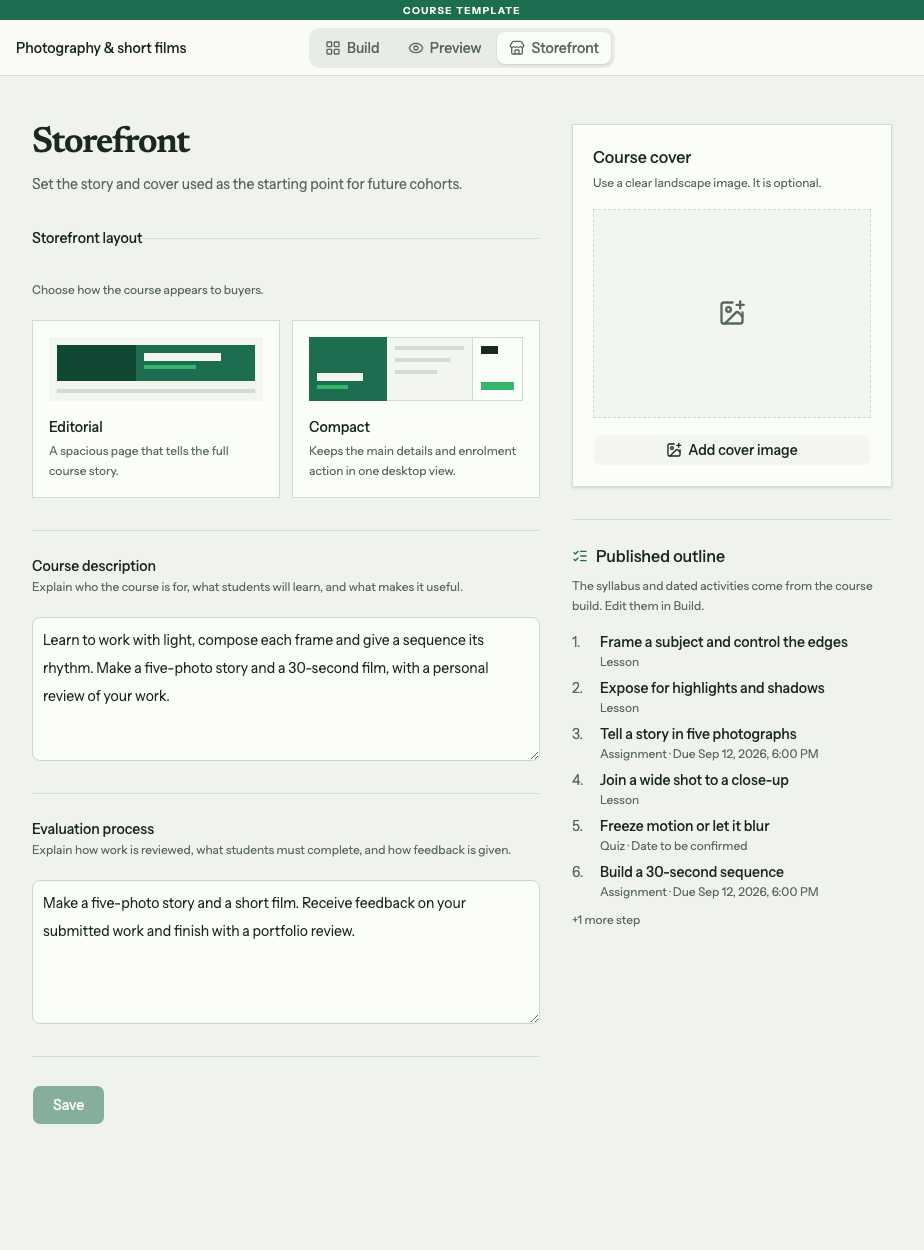
Use Course description for the offer and Evaluation process to explain feedback. Add cover image is on the right.
For a paid course, open Settings → Payments and select Connect Stripe. Complete the account setup before opening paid enrolment.
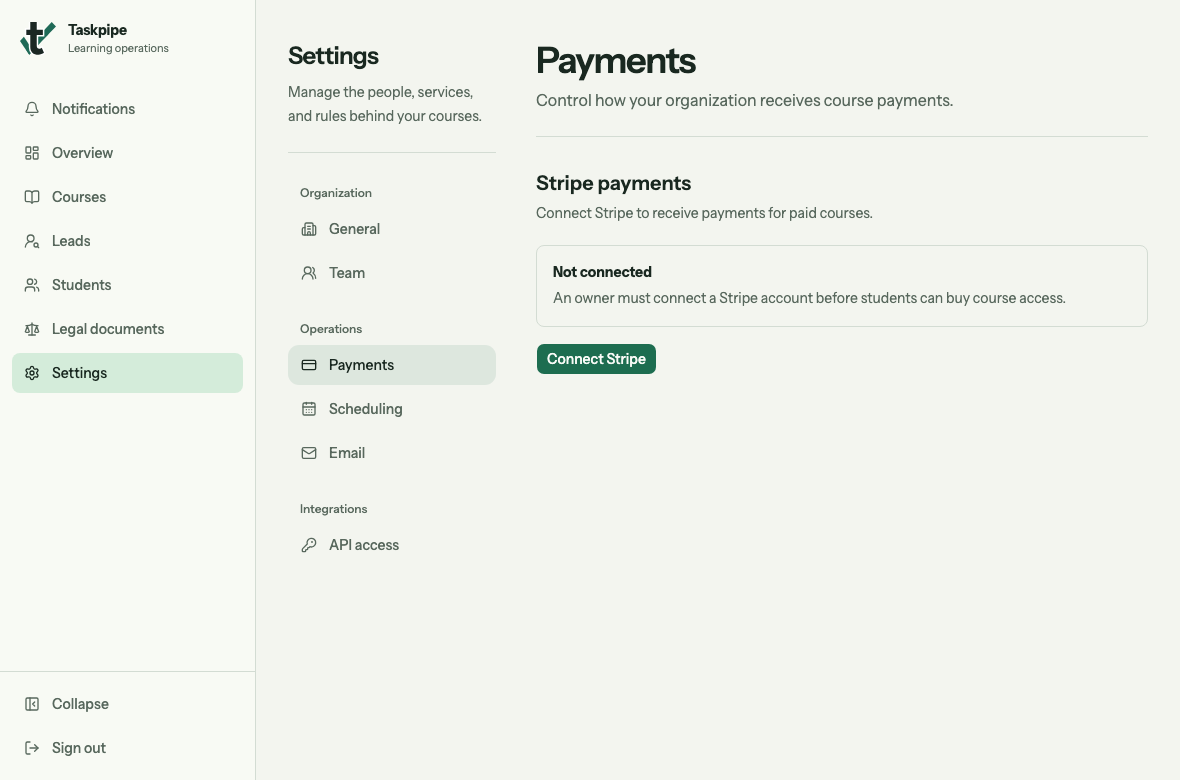
Connect Stripe is available to the organization owner.
In the group’s Settings, expand Cohort price. Choose Paid under Price type, enter the price and select Save. You can also offer free enrolment.
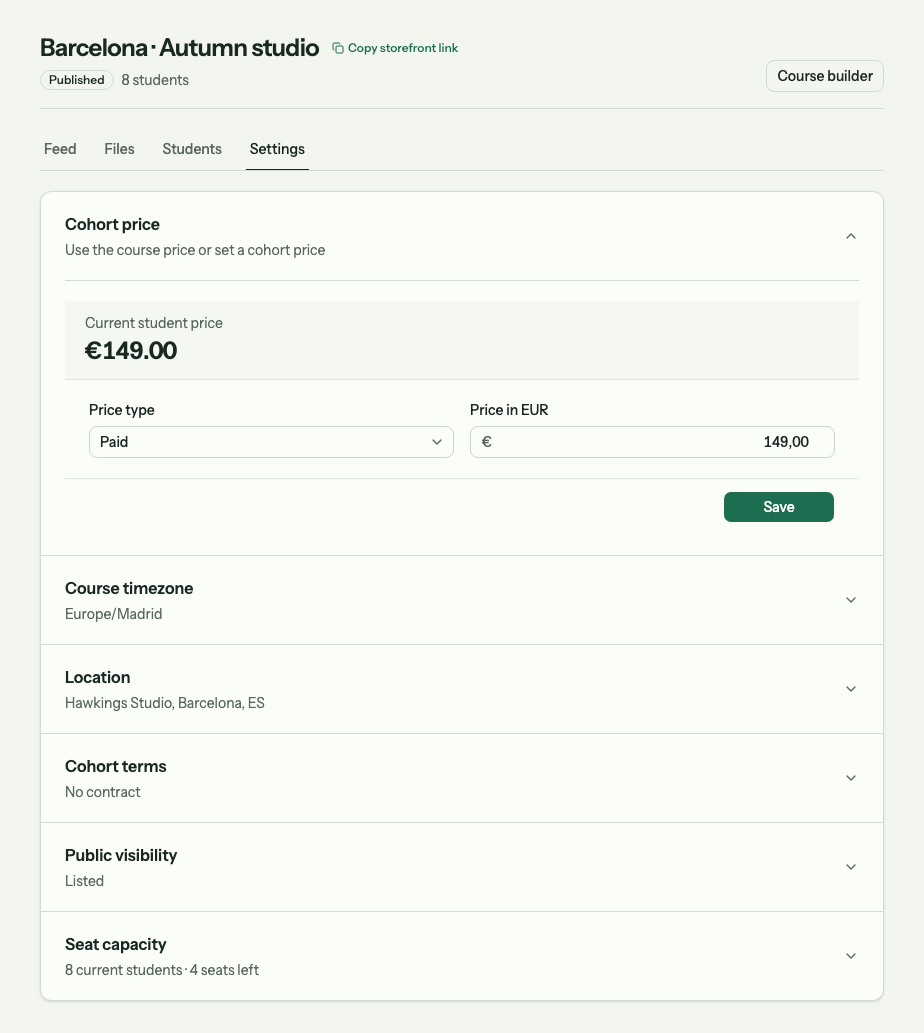
This example charges €149 for the group. Check the amount before saving.
Check what students will see
Preview the group’s lessons. Make sure the first task is clear and each lesson leads to the next. Fix any issues shown when you publish.
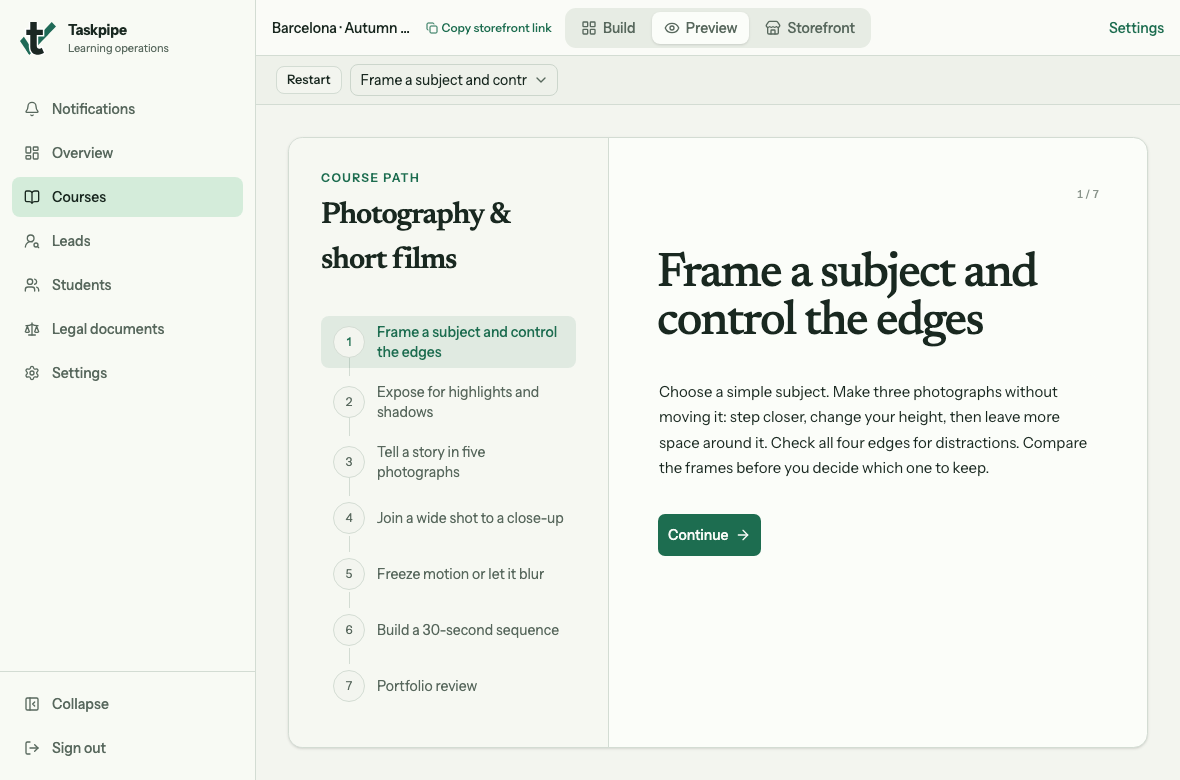
Use Preview to work through the student path before sharing the course.
Then open the group’s public course page. Check the course title, lesson outline, group dates, location and price against what you intend to offer.
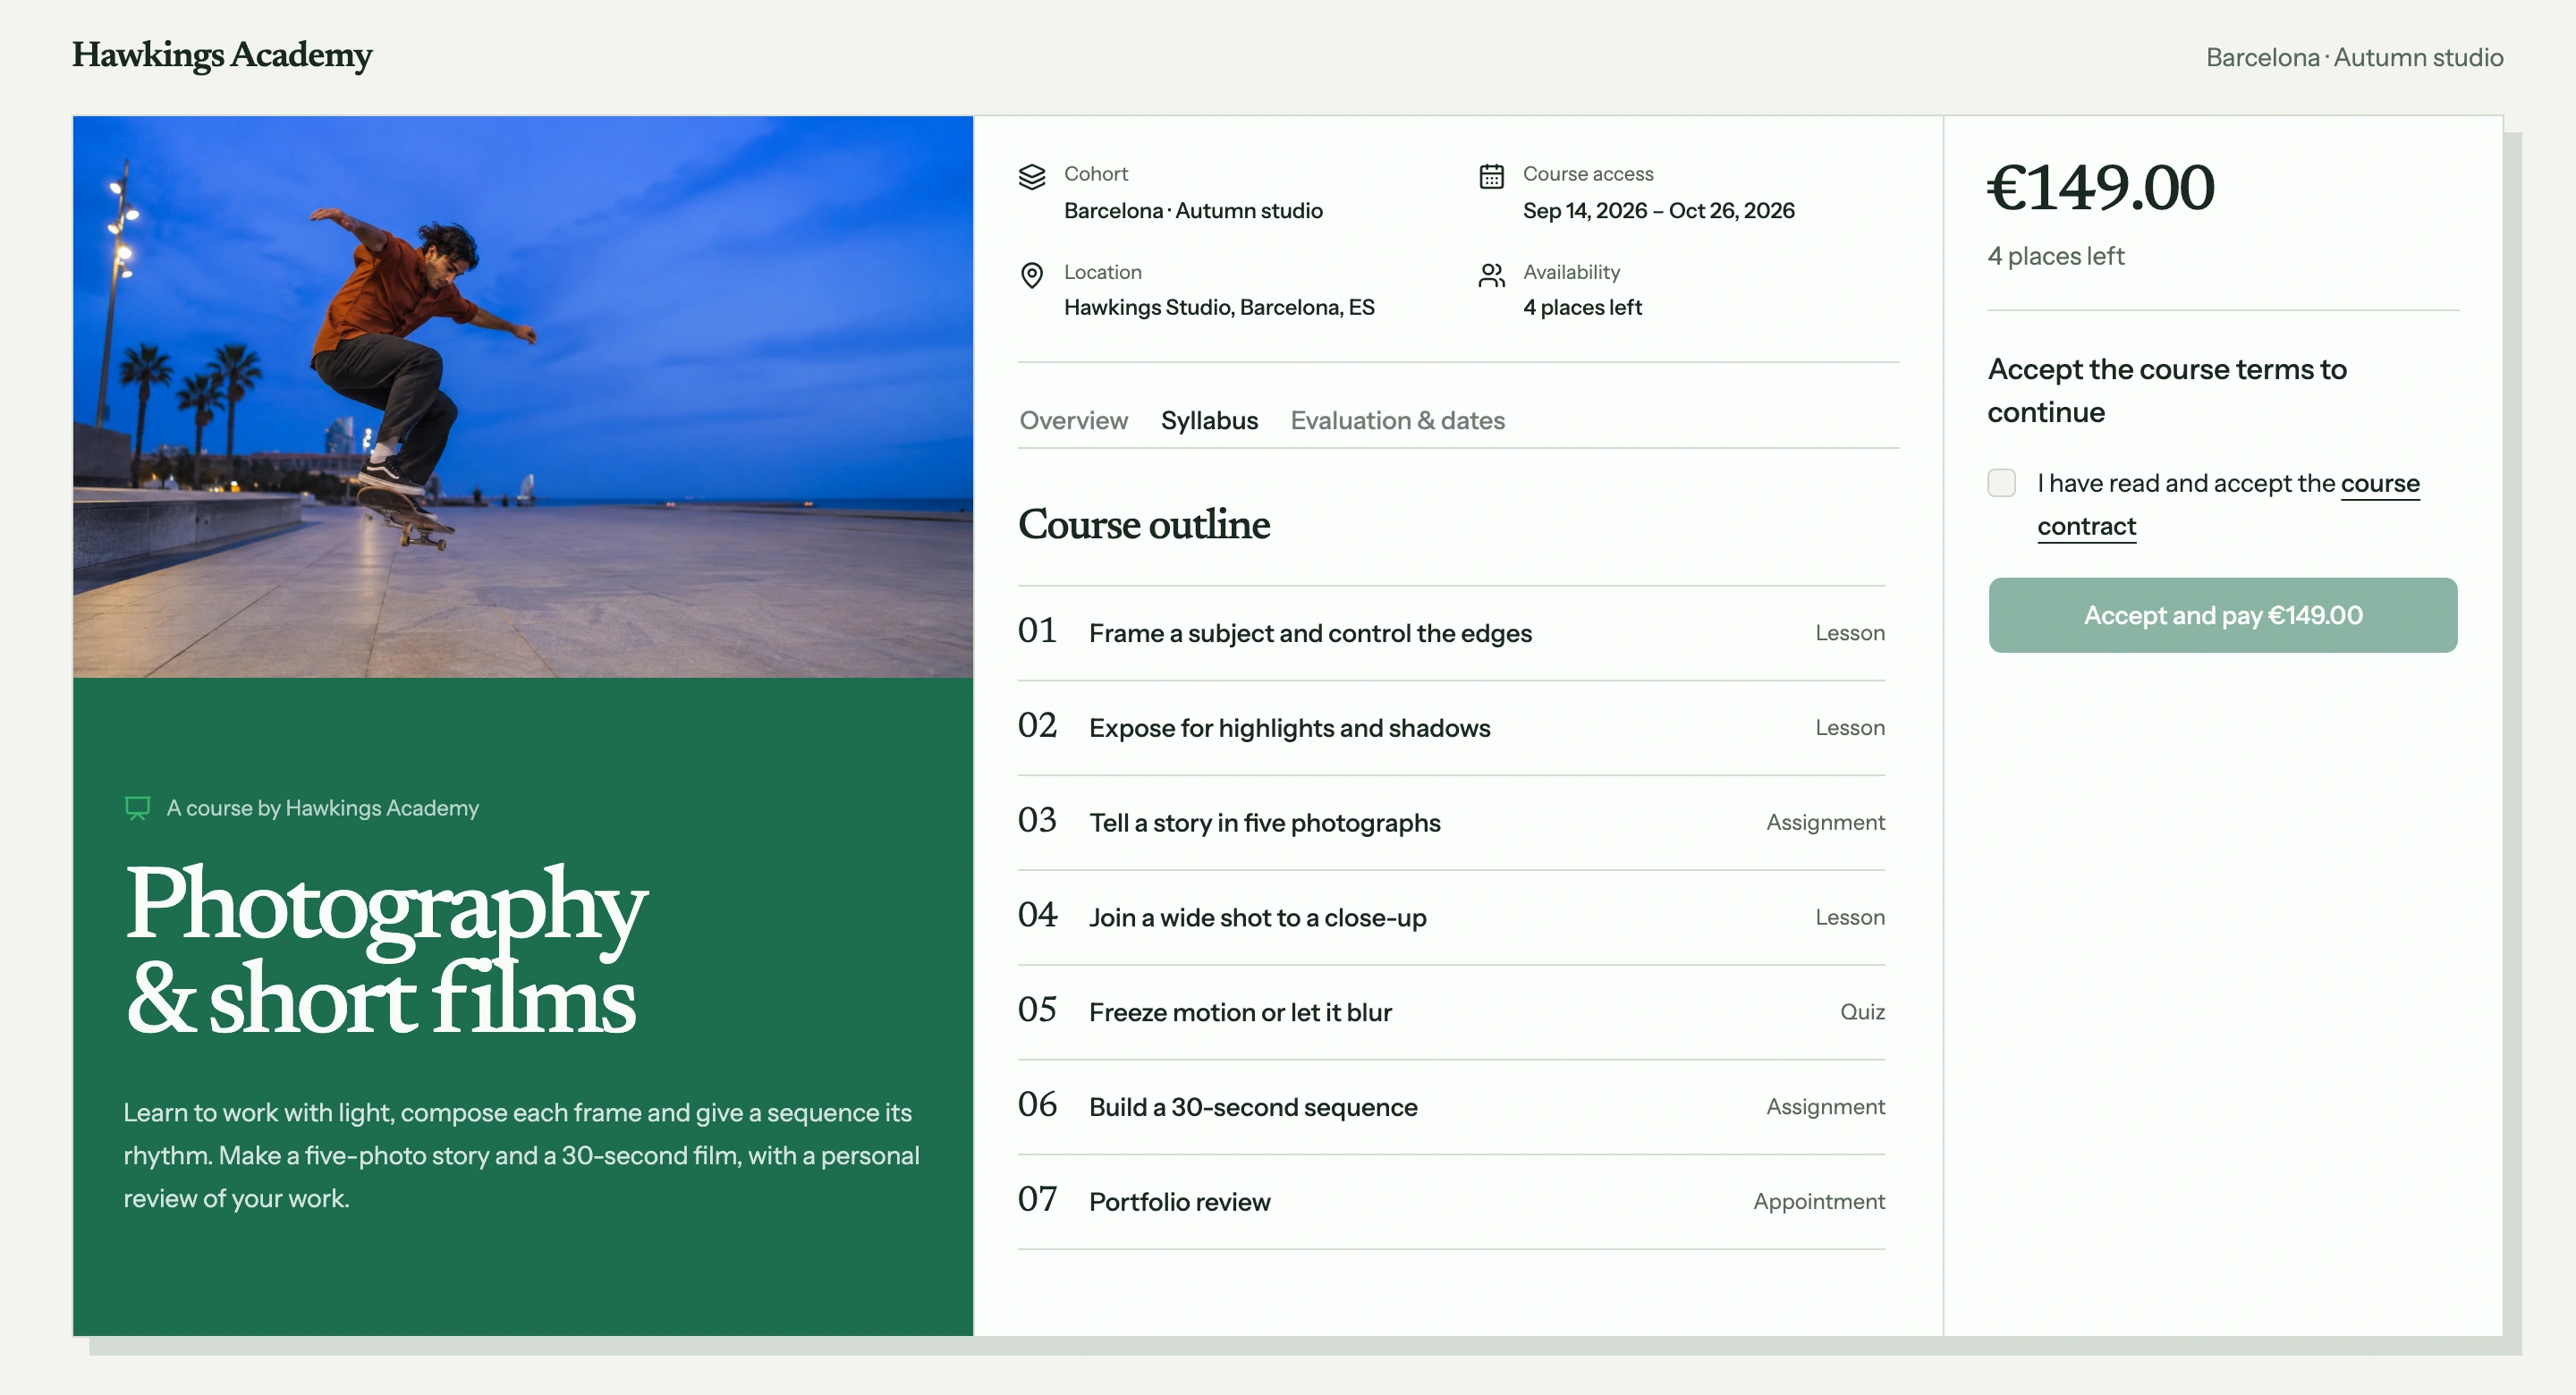
This is the page a buyer sees. Check the lesson list under Syllabus and the group details beside it before sharing the link.
Share that page with your audience. Students sign in with a code sent to their email, so they do not need to create a password.
Welcome your students
Once people join, open the group’s Students area to follow their progress. Course builder takes you back to the lessons; Feed is where you share group updates.
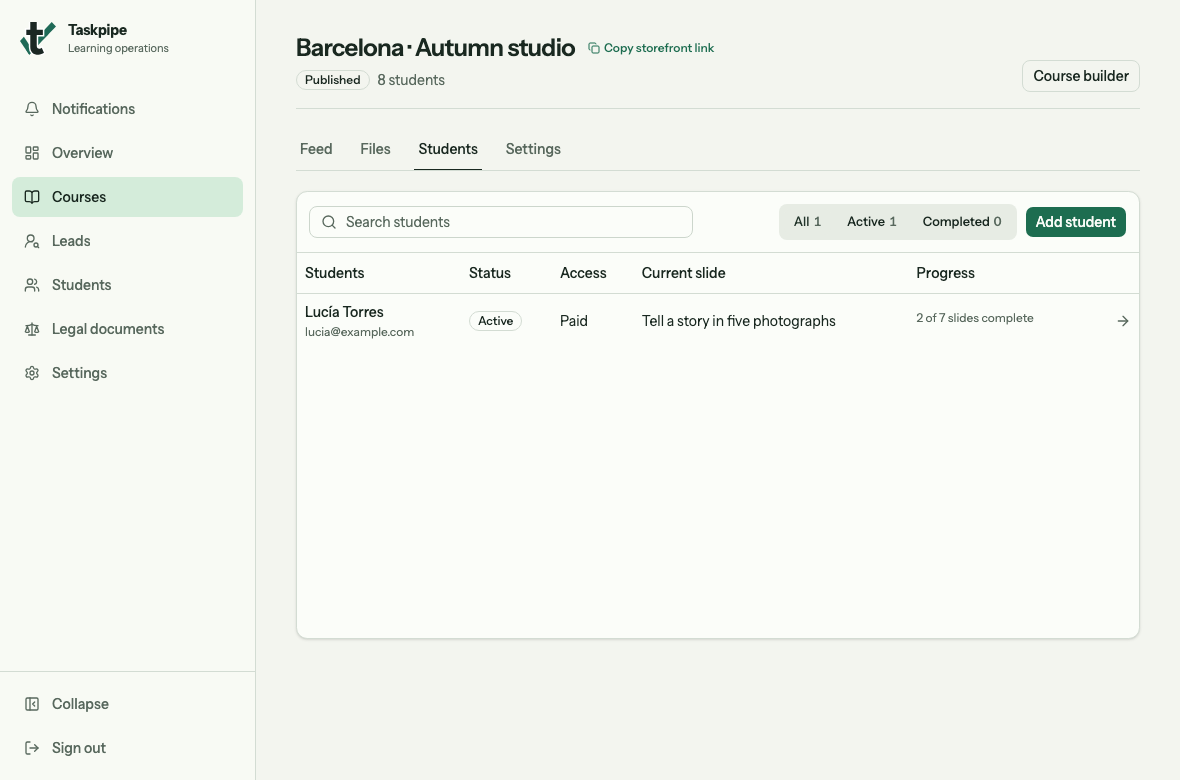
The student row shows which task they have reached. Open it to review their work.
When you are ready to review work before students move on, follow the practice and feedback guide.